
brewfun
Grandmaster Brewer
One of the frequently requested features for BeerSmith is the addition of “Brewing Sessions” which would be separate from the main recipe file. The fact is, it’s already there but like many things in this program it’s hidden in plain sight. BeerSmith uses the term “Brew Log.”
You can customize the name for the log file. It’s very simple and quick.
Go to the Options menu; select Advanced. Go down to “Brew Log Name” and change it. Click "OK." There! Done!
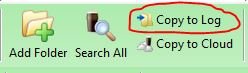
To populate the log from the “My Recipes" file, all you have to do is highlight the recipe you want to make, click Copy to Log. If you have not created the log file, it will be created automatically the first time you copy a recipe into it. Right after you copy, you will see the lower report window state “No items are currently selected.” Ignore this message. All it means is that the copy task is complete and you can’t accidentally copy it again, delete it or anything else. Just reselect the recipe to continue with it.
Using either the command bar, view ribbon or the left side tool bar; select “My Recipes”. You will now see your main recipe folder(s) along with the newly created brew log file. The recipe inside is now ready to record the brew date and details of your brewing session.
You can have multiple recipe folders for personal, club brews, collaborations, clones, etc. All of them will copy to the brew log, so you can track all of your sessions.
Option: Suppose that you have created a recipe or have imported one from the cloud, email, etc. You can record your brew session directly to the recipe, THEN copy it to the brew log as an archive.
Pro Tip: Create recipes with a blatantly old date (I think if you use all zeros, it defaults to 3/1/2000) in your recipes file. When you copy to the log, a date sort places them all together so you can see what you planned to brew. You can then just highlight them and add them to the shopping cart for an easy shopping list. Recipes having the same date in the main folder will still sort alphabetically.
You can customize the name for the log file. It’s very simple and quick.
Go to the Options menu; select Advanced. Go down to “Brew Log Name” and change it. Click "OK." There! Done!
To populate the log from the “My Recipes" file, all you have to do is highlight the recipe you want to make, click Copy to Log. If you have not created the log file, it will be created automatically the first time you copy a recipe into it. Right after you copy, you will see the lower report window state “No items are currently selected.” Ignore this message. All it means is that the copy task is complete and you can’t accidentally copy it again, delete it or anything else. Just reselect the recipe to continue with it.
Using either the command bar, view ribbon or the left side tool bar; select “My Recipes”. You will now see your main recipe folder(s) along with the newly created brew log file. The recipe inside is now ready to record the brew date and details of your brewing session.
You can have multiple recipe folders for personal, club brews, collaborations, clones, etc. All of them will copy to the brew log, so you can track all of your sessions.
Option: Suppose that you have created a recipe or have imported one from the cloud, email, etc. You can record your brew session directly to the recipe, THEN copy it to the brew log as an archive.
Pro Tip: Create recipes with a blatantly old date (I think if you use all zeros, it defaults to 3/1/2000) in your recipes file. When you copy to the log, a date sort places them all together so you can see what you planned to brew. You can then just highlight them and add them to the shopping cart for an easy shopping list. Recipes having the same date in the main folder will still sort alphabetically.
")